Marbled Chocolate Brownies

Unfortunately these were eaten too quickly for me to get a decent photo!  But at the end of the day a brownie is a brownie – I’m sure you can use your imagination!

Ingredients:

175g plain chocolate

175g white chocolate

225g margarine (Stork works perfectly)

3 eggs

1 tsp vanilla essence

75g self-raising flour

100g white chocolate chips

100g plain chocolate chips

Method:

1.  Grease and baseline an 8″ square tin.  Preheat oven to 190°C.

2.  Divide the margarine in half between two microwavable bowls.  Break the chocolate into small pieces.  Add the white chocolate pieces to one bowl and the plain chocolate to the other bowl.  Melt both sets of chocolate and margarine in the microwave.  (Heat each bowl separately.)

3.  In another bowl, combine the eggs, sugar and vanilla essence.  Divide the sugar mix between the two bowls of chocolate and stir well.  Fold in half of the flour to each mixture and add the corresponding chocolate chips.

4.  Using a large spoon, ladle or by decanting into pouring jugs, decant the mixtures into the prepared tin. Try to keep the flavours as separate as possible.  (I like to use a ladle to pour in alternating spoonfuls of each flavour.)

5.  Once all of both mixes have been added to the tin, place in the oven for 40 minutes.  It may still seem squidgy to the touch but will continue to bake in the tin once it has been removed from the oven.

6. Leave to cool in the tin.  Once out-turned, use a pizza slicer or knife to cut into 16 portions.

7.  Enjoy warm with ice cream and a handful of strawberries!

Quick and Easy Mini Chocolate Easter Nest Cakes

These  cakes are the perfect size for little ones, and are still naughty enough for grown-ups and are small enough to not feel guilty about!  Kids will love helping create the tiny nests – probably a perfect job for little fingers.  They’ll be just as eager to lick the spoon too!

Ingredients: (Makes approx 24)

80g soft margarine

2 medium eggs

80g self-raising flour

30g cocoa powder

1 tsp baking powder

80g caster sugar

For the icing and nests:

Large handful shredded wheat bitesize cereal

100g dark chocolate

Cheat’s ingredient: 1 tub ready made chocolate frosting (I prefer Betty Crocker’s Chocolate Fudge Icing)

1 packet mini eggs

Method:

1. Preheat oven to 180°C.  Line a mini muffin tin with mini paper cases.

2. Measure the caster sugar and margarine into a bowl and combine.  Add the eggs one at a time and mix well.  Sift the flour, baking powder and cocoa into the bowl and stir until well combined.

3.  Spoon the cake mix into an piping bag and squeeze equal volumes into each mini case.  (You need them to be just under half full.)  If you don’t have piping bags, a couple of teaspoons will do the job – just be careful not to drip too much!

4.  Place into the oven for appox 12 mins or until risen and firm.  (A skewer should come out clean after being inserted into a cake.)

5.  Remove from the oven.  Leave to cool for a couple of minutes and place the cakes on a cooling rack.  If you still have cake mix left re-line the tin and bake a second batch.

6.  Once all cakes are cooled it’s time to make the nests.  Break up the chocolate and melt slowly either in the microwave or over a pan of hot water.  (If using a microwave be sure to stir at 30 second intervals to prevent burning.)  Break up the shredded wheat into fine twig-like pieces and combine with the melted chocolate.  Cover a plate with cling film and spoon small piles of the mix onto the plate.  Using the back of a teaspoon make a dent in each pile and push a mini egg into it.  Once finished, place the plate in the freezer for a couple of minutes to quickly set the nests.

7.  Using a blunt knife, ice each of the cakes with the frosting.  You can use hot water to clean the knife each time – the hot metal will also help create a smooth finish to the frosting.  (Be sure to supervise children around hot water.)

8.  Place one nest on each frosted cake and push down gently to hold it in place.  Place in the fridge to set.

(If you’re in even more of a hurry, skip the nest part and push mini eggs directly into the top of each frosted cake.)

9.  Share and enjoy!


Chocolate Guinness Cake

Whilst I’m no stout fan, I’ll make the most of any opportunity to bake up a chocolate cake.  In honour of St Paddy’s Day, this cake, with its rich colour and taste is one of my favourites.  Whilst you can’t actually taste the Guinness, it definitely adds a deepness to the flavour.  The texture is so lusciously smooth that I like to use a crunchy meringue topping, but you could use a simple cream cheese icing if you prefer.

Ingredients:

250ml Guinness

250g unsalted butter

75g cocoa powder

400g caster sugar

142ml sour cream

2 medium eggs

1 tbsp vanilla extract

275g plain flour

2 ½ tsp bicarbonate of soda

3 tbsp blackberry jam

For the meringue:

3 medium egg whites

165g caster sugar

Method:

  1. Preheat the oven to 180°C and grease a 23cm springform tin.
  2. Heat the butter and Guinness in a large saucepan until the butter has melted.  Whisk in the cocoa powder and sugar until there are no lumps and the mixture is well combined.
  3. In a separate bowl beat together the eggs, sour cream and vanilla extract and add to the chocolate mix folding through until combined.  Add the flour and bicarbonate of soda and whisk through.
  4. Pour the mix into the springform tin and bake for around 45 minutes or until a skewer comes out clean.  Remove from the oven and leave to cool.
  5. Once cool, remove from the tin.  Use a skewer to punch holes through the top of the cake.  Heat up the jam in a saucepan over a low heat and use a pastry brush to brush over the top of the cake.  Leave for the jam to cool.
  6. To make the meringue, break three egg whites into a large clean bowl.  Don’t forget the eggs will expand once whisked! (Use a clean tea towel or kitchen paper to remove any grease from the bowl before using.)  Use an electric whisk, or plenty of elbow grease to whisk the whites until foamy and it forms soft floppy peaks.  Add a third of the sugar and whisk until thickened.  Continue to gradually add the sugar and whisk until all combined and the meringue forms stiff peaks.
  7. Wrap a double-folded strip of baking paper around the sides of the cake with a piece of string.  Then transfer the meringue into a piping bag to decorate the cake, or use a spatula and fork to spread it over and spike it up.
  8. Place on a baking tray and bake in the oven at 150°C until the top is crunchy and the middle is still squidgy.  You could also use a baking blowtorch, or a grill on a low heat

As an alternative, you could whip up this quick dessert using the same recipe.  Bake the cake as above.  Heat a handful of blackberries in a saucepan with a splash of water and a couple of tablespoons of caster sugar.  Use a potato masher to crush the berries and heat until the sugar is dissolved.  Strain through a sieve to separate the seeds.

Divide between serving glasses with a few berries in the bottom of each.  Crumble up the cake and spoon into the glasses.  Top with a layer of crumbled meringue that you could either make or buy.  Speedy and scrummy, and you’ll most likely have a slice or two of cake leftover to enjoy!

S’mores

In honour of World Thinking Day, this is my favourite memory of Brownie and Guide camps.  If you’re not planning on getting a tent out and campfire burning any time soon, a candle will work just as well.  Kids of any age will love making these!

Ingredients: (Makes 4)


8 marshmallows (large)

8 biscuits (we always used digestives, but you could use chocolate digestives, rich teas – anything that has a good surface area and is relatively thin)

8 chunks of chocolate or a handful of chocolate chips

1 banana, sliced (Optional)

Method:

1.  Soak 4 wooden skewers in water for 30 minutes to prevent burning.

2.  Thread the marshmallows on to the skewers and toast over your campfire or candle until squidgy.

3. Carefully remove marshmallows from the skewer and place on top of a biscuit.

4.  Add a chunk of chocolate and a slice of banana and sandwich together with the another biscuit.

5.  Eat and repeat!


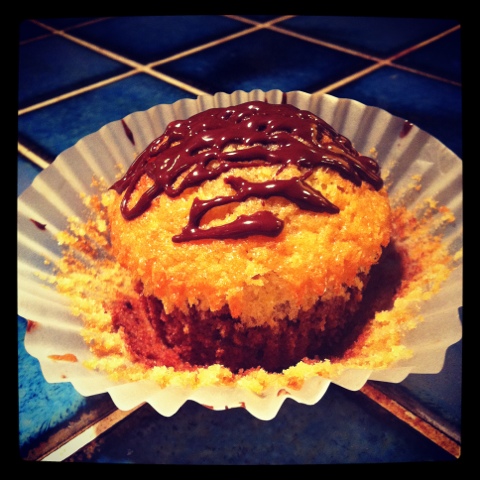
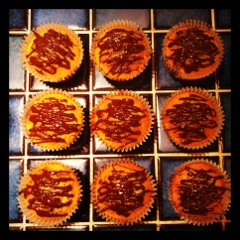
Chocolate Orange Layered Muffins

20120130-220754.jpg

These scrummy muffins take just a few minutes to make. With just 15 minutes in the oven you can be eating these warm within half an hour if you’re quick!

Ingredients:
175g soft margarine
175 caster sugar
3 medium eggs
175g self-raising flour
1 tsp baking powder
1 tbsp cocoa powder
1 orange
Any leftover dark chocolate or chocolate chips you may have lying around (not likely in my house!)

Method:
1. Preheat the oven to 180*C and line a 12-hole muffin tray with paper cases.
2. Cream the sugar with the margarine. Add the eggs and combine. Sift the baking powder and flour into the mixture and stir well until combined.
3. Transfer half the mixture into a separate bowl. Add the cocoa powder to one mixture. If you’re using chocolate make sure it’s chopped into small chunks and add to the chocolate cake mix. Chocolate chips can be added as they are.
4. To the other mixture add the zest of the orange together with the juice of half the orange and stir well.
5. Carefully spoon the chocolate mixture equally into the bottom of the cases without dripping any on the tray or paper case edges.
6. Spoon the orange mixture equally between the cases on to of the chocolate mix.
7. If you want a marbled texture use a wooden toothpick to stir the mixtures slightly. I prefer to keep these as layered cake.
8. Bake in the oven for 15-20 minutes until springy and a skewer comes out clean. Remove from the oven once cooked.
9. Leave to cool in the tray for a couple of minutes before transferring to a cooling rack. This will prevent the bottoms from going soggy.
10. If you’ve got any chocolate left over, melt it slowly (I was lazy and used the microwave I’m ashamed to admit! Never do this with white chocolate) and drizzle as a final layer over the tops of your muffins.
11. Eat while warm for gooey chocolateyness!

20120130-222404.jpg

Chocolate Chip Panettone Bread & Butter Pudding

An adapted recipe from a yellowing Woman and Home Christmas edition, this is a fab dessert for chocolate lovers and can be assembled in just 30 minutes!  I’ve supplemented Tia Maria instead of rum to give it a coffee ‘Tiramisu’ likeness, but you could add Gran Marnier for an orange twist, stick with the brandy, or add any liqueur that takes your fancy!

I used a 12 x 10″ dish to serve this in which served six and left me with enough leftovers to savour for a couple of days!

Ingredients: (Serves 10)

400g dark chocolate (broken)

600ml double cream

60g butter

100g sugar

3tbsp Tia Maria (or other liqueur)

2 eggs (whisked)

1 (500g) chocolate chip panettone

Method:

1. Heat the butter, sugar, cream, chocolate and liqueur in a heatproof bowl over a pan of simmering water.  Stir until the chocolate has melted and the mixture has fully combined.  Leave to cool for 10 minutes.

2.  Cut the panettone into slices approx 1cm thick.  Cut these in half diagonally to form triangles and layer in an ovenproof dish.

3.  Add the eggs to the chocolate mix once slightly cooled and stir through.  Pour the chocolate sauce over the bread and leave to soak.  Cover and chill in the fridge until needed.

4.  Heat in an oven at 150°C for 30 minutes and serve the piping hot chocolate dessert with a scoop of vanilla ice-cream.  Heaven!


Happy Christmas all! x

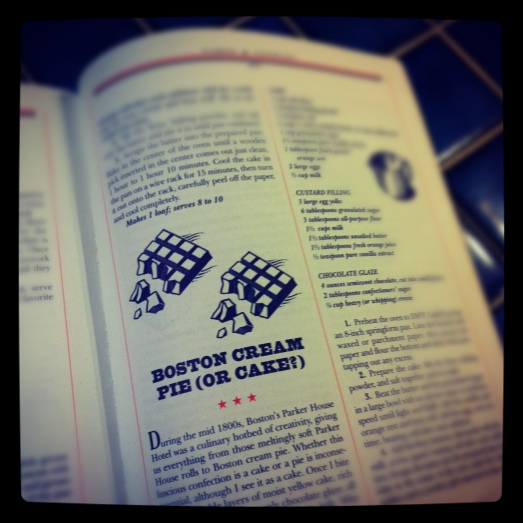
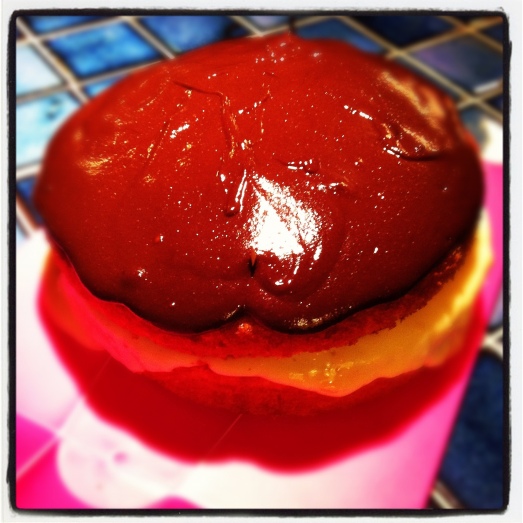
Boston cream pie

After dropping my phone in the milk, curdling the custard, burning the chocolate (and myself) I’m afraid I may never make Boston Cream Pie again! If you think you can do better, here’s the recipe!

20111123-225356.jpg

Ingredients:
For the sponge:

225g soft margarine
225g caster sugar
4 eggs
225g self raising flour
2tsp baking powder
Zest of 2 oranges
1tsp vanilla extract

For the custard:
3 large egg yolks
6tbsp granulated sugar
3tbsp plain flour
350ml milk
50g unsalted butter
1.5tbsp fresh orange juice
0.5tsp vanilla extract

For the chocolate glaze:
120ml double cream
2tbsp icing sugar (sifted)
120g chocolate

Method:
1. For the cake: preheat the oven to 180*C and grease and baseline two 20cm cake tins.

Measure all the ingredients into a large bowl and beat until well combined. Split the mixture between the two cases and bake for 25 mins or until golden brown and springy to touch. Leave to cool in the tins for a few minutes before transferring into a cooking rack.

2. For the custard: whisk the egg yolks in a bowl and add the sugar and flour to make a smooth paste.

Heat the milk in a pan until hot (do not boil). Slowly whisk 1/3 of the milk into the egg mixture and continue whisking until the sugar has dissolved and it is smooth. Slowly pour this mix back into the pan of milk whisking continuously.

Bring the mix to the boil and stir continuously with a wooden spoon for one minute until the sauce has thickened and holds a trail on the back of the spoon when you run your finger across it. (Careful not to burn your finger here!)

Remove from the heat and add the butter, orange juice and vanilla and stir well.

Transfer the mix into a bowl and lay a piece of cling film over the custard to prevent a skin from forming. Leave to cool to room temperature.

3.For the chocolate glaze: Melt the chocolate with the cream over a low heat, stirring continuously. Once melted, stir in the icing sugar until think and glossy.

4. Construct the cake: stir the custard until smooth and spoon onto one of the sponges. Lay the other sponge on top and pour the chocolate glaze over the top leaving to run down the sides.

Leave aside to set for at least an hour before serving.

Good luck!!

20111123-231354.jpg

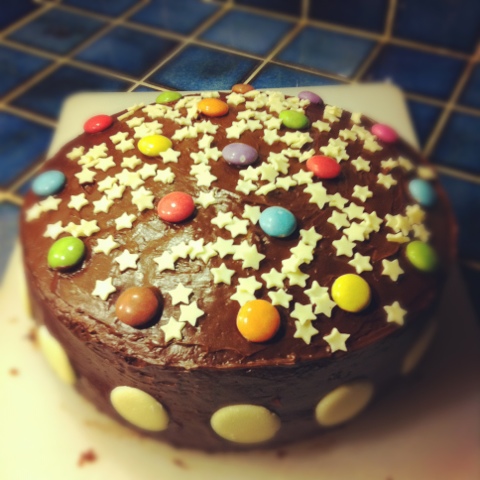
Chocolate Smartie Cake

This simple chocolate cake still impresses friends and is a popular choice for birthdays. My favourite part of this recipe is licking the spoon of the chocolate icing – heaven!!

Ingredients

2 tbsp cocoa
3 tbsp boiling water
225g margarine
225g caster sugar
4 medium eggs
225g self-raising flour
2 tsp baking powder
275g plain chocolate
75g unsalted butter
Sweets to decorate

Method:
1. Sift the cocoa into a mug and measure in the boiling water. Mix until fully blended and leave to cool.
2. Cream together the margarine and sugar. Mix in the eggs, sift the flour and baking powder and stir until combined.
3. Add the cooled cocoa mix and fold through the cake mixture.
4. Divide between two 20cm cake tins (greased and base lined) and bake in the oven at 180*C for around 25 minutes.
5. Once cooked, remove the cakes from the oven. Leave to cool of a few minutes in the tins. Run a knife around the edges of the cakes and transfer onto a cooling rack.

For the icing:
1. Melt the chocolate and butter in a bowl over a pan of simmering water. Once fully melted stir well and leave to cool for 5 minutes or until it has reached a spreadable consistency.
2. Sandwich the two cakes together using the chocolate icing. Then spread the remaining icing over the sides and top of the cake. I used a bowl of hot water to heat a table knife to use to create a smooth finish with my icing but you could use a fork to create tiny spikes or a pattern of your choice.
3. Top with decorations of your choice. I’ve used giant chocolate buttons around the sides, and smarties and mini chocolate stars (from Morrisons) on the top.

20111107-223115.jpg