Mince Pies

I’ve never been a fan of mince pies.  The name doesn’t do them any favours.  So this year, to overcome my adversity to them, I decided to make them – and now I can’t get enough!  I’ve managed to convert a few other mince-pie-haters in the process too! This is a suet-free, nut free mince recipe, but no two mincemeat recipes are the same so feel free to adapt to your taste.  If you haven’t got time for the whole process, just pop to the supermarket and supplement with some ready-made pastry and/or mincemeat.

I use this recipe to make a mixture of mini, normal and muffin-tin sized ‘deep filled’ pies so can’t be sure exactly how many you’ll get out  of it.  It’ll be in the region of 18 deep-filled pies.

Mince_pies_1

Both the pastry and the mincemeat taste best when made a day in advance of making the pies.  Keep the mincemeat in a sterilised jar in a cool larder.  (The easiest way I find to sterilise is to put the jars into the dishwasher on the highest temperature setting, before starting to cook.  Keep the dishwasher door shut until you need the jars.  This will keep the jars hot and stop those pesky bacteria getting in!

Ingredients:

For the sweet shortcrust pastry:

250g plain flour

100g icing sugar

150g butter (unsalted)

2 egg yolks

1 egg

Zest of 1 orange

1 tsp grated nutmeg

For the mincemeat:

250g light soft brown sugar

250ml cider

1kg bramley apples

1 tsp mixed spice

1 tsp ground cinnamon

250g currants

250g raisins

100g dried cranberries

75g glace cherries, roughly chopped

Rind and juice of 1 lemon

Rind and juice of 2 satsumas/nectarines or 1 orange

6 tbsp brandy

3 tbsp orange liqueur e.g Cointreau

Method:

For the pastry:

1. It’s really important to keep everything cold when making pastry.  Put a grater, a knife, a spoon and any food-mixer bowls/attachments in the fridge 30 minutes before you start.  Keeping the pastry cold will keep the gluten strands short and will give you a crisper ‘shorter’ pastry. (The opposite of bread dough which you keep warm, and knead for long gluten strands and a bouncy, chewy dough.)

2. Grate the butter using the chilled grater and return to the fridge. Weigh out the other ingredients.  Pass the dry ingredients through a sieve into your cold mixing bowl.  Add the chilled grated butter.  Work the flour mix and butter with your finger tips to produce a breadcrumb-like texture.

3.  Wash your hands and rinse using cold water.  Don’t forget your hands are also a cooking utensil when making pastry!

4.  Add the eggs.  You can use a food processor or kitchen aid for this part but be careful not to work t he dough mixture too much.  Otherwise use a cold metal spoon to combine the ingredients and then finally bring together with your hands.

5.  Lightly flour the dough, wrap in clingfilm and return to the fridge.

6. Warm your hands up!

For the mincemeat:

1. Peel, core and roughly chop the apples to small dice sized chunks.

2. Dissolve the sugar in the cider in a large pan over a low heat.  Add the apples.

3. Add the spices, dried fruit, mixed peel and cherries and stir well.  Add the citrus rind and juice and stir again.

4. Keep on a low heat, heat through and simmer for 30 minutes stirring occasionally.

5. Remove from the heat and stir again.  Add the brandy and orange liqueur and stir well.  Spoon into the sterilised jars and keep somewhere cool until needed.

To make the pies:

1.  Remove the pastry from the fridge an hour before needed.  Preheat the oven to 220 °C. Grease and lightly flour a tart tin, whether you’re using a mini muffin tin, regular tart tin, or large muffin tin.  Tear off about a third of the pastry and keep the rest wrapped in the cling film.

2.  Lightly flour your surface and rolling pin.  Press the pastry out into a flat circular shape using your hands, then roll out to a thickness of about 3mm.  Too thin and the mincemeat might soak through, too think and they will be stodgy and may not cook all the way through.

3.  Using a cutter, cut into circles slightly larger than the moulds. Push them into the tart moulds.  If there’s any pastry the overlaps the top, you can use a smaller cutter to remove any excess.  Re-roll the pastry and repeat until all cases are lined.

4.  Roll out more pastry, slightly thicker this time.  Use a cutter to cut pastry tops for your pies.  I have a snowflake cutter I like to use, but you could use a star, christmas tree or heart shape if you prefer. If you like a shiny finish to your pies, lightly brush each pastry top with an eggwash. Alternatively you can leave them without an eggwash and they will have a rustic, matt finish, equally nice!

4.  Fill the pastry cases with the mincemeat.

5. Place the pastry toppers onto each pie making sure they make contact with the pastry liners where possible.  (I like to sprinkle mine with a tiny amount of demarara sugar at this stage which makes for a crispy sweet topping.)

6.  Place in the oven for 10-15 minutes depending on how large the pies are. Remove once golden and leave to cool in the tin for a few minutes. Once cool enough to handle, remove from the tins and leave to cool on a cooling rack.

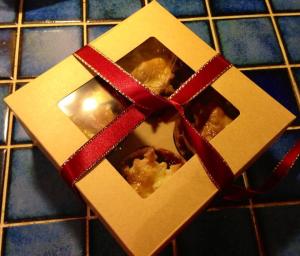
7.  Box them up and give away as gifts, or sprinkle with some icing sugar before serving, preferably with a dollop of brandy butter and a glass of mulled wine!

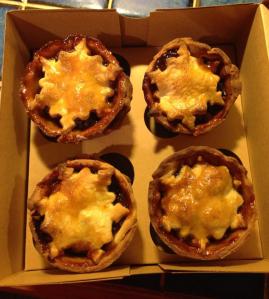
Mince_pies_2

Christmas Cake Pop Baubles

These cake pops are so beautiful it will take a lot to convince people that they’re as good to eat as they are to look at!

Perfect for getting in the Christmas spirit, and for occupying impatient children on school holidays, these will be perfect distractions in the run up to Christmas, and scrumptious treats for friends and family on Christmas Day.

Christmas tree cake pops

Ingredients: (makes around 24, 12 Chocolate and 12 Vanilla)

225g soft margarine

225g caster sugar

4 eggs

225g self-raising flour

2 tsp baking powder

2 tbsp cocoa powder

1 tsp vanilla extract

For the frosting:

80g unsalted butter (softened)

40g cream cheese (softened)

200g icing sugar (sifted)

1 tsp cocoa powder

1 tsp vanilla extract

For decorating:

200g white chocolate

200g milk chocolate

Various decorations

Cake pop sticks

Ribbon

Sellotape


Method:

For the cake:

  1. Preheat the oven to 180°C and grease and baseline two 8” (20cm) sandwich tins.
  2. Cream the margarine and sugar together.  Add the eggs and baking powder.  Weigh out the flour but keep 2 tbsp aside.  Add the flour to the mix and fold through until well combined.
  3. Decant half the mix into a separate mixing bowl.  Add the remaining 2 tbsp flour to one mix, as well as a splash of vanilla extract.  Add the cocoa powder to the other mix and stir both mixes until mixed through.
  4. Fill the sandwich tins with each cake mix and bake for about 25 minutes or until golden brown and springy to touch.
  5. Leave to cool in the tins for a few minutes before transferring onto a cooling rack.


For moulding the baubles:

  1. Once completely cool, break up the cakes in 2 large bowls into a breadcrumb consistency. (Kids are usually great at this – just don’t let them eat too much of it!) You can remove the crusts if you want to avoid lumps but I actually prefer a surprise chunk of cake hidden here and there!
  2. Cream together the butter and cream cheese. Gradually add the icing sugar and mix until light and fluffy.  Again, split the mix between two bowls.  Add the cocoa powder to one, and the vanilla extract to the other and mix through.
  3. Add the frosting to the cake crumbs a spoonful at a time and mix with the crumbs.  (Chocolate to chocolate and vanilla to vanilla.) I find it easiest to do this by hand.  Keep adding the frosting until you have a fudgy consistency.  Once it’s pliable, and doesn’t crumble when you try to mould it, it’s ready to rest in the fridge.  Wrap each mix in cling film and refrigerate for 30 minutes.
  4. The mixtures should now be firm but not too hard.  Line a baking sheet with greaseproof paper.  Break of ping-pong ball sized chunks and mould into your desired shape.  I’ve used cubes and spheres for my baubles.
  5. Place each bauble onto the baking tray and once you’ve completed all of them, refrigerate again for 20 minutes.


For decorating:

  1. Now for the fun bit! After chilling the baubles, melt 40g of each of your chocolates in separate bowls.
  2. Get your pop sticks ready.  They usually come about 20cm long.  If you’re using them as baubles you’ll need to trim these down.  Mine measured 6cm.
  3. Dip 2cm of your stick into the chocolate and insert into the bottom of each cake pop.  Use the white chocolate for the vanilla cakes and the milk chocolate for the chocolate cakes. Leave to set for 1-2 minutes until the chocolate has hardened.  They should now be well bonded to the cakes.
  4. Melt the rest of your chocolate – depending on how many little helpers you have you might like to do this one flavour at a time.
  5. Decant your sprinkly cake decorations onto saucers, bowls or small plates – anything which will let you roll the cakes around in.
  6. One by one, dunk each cake pop into the melted chocolate, keeping hold of the stick.  Remove any excess chocolate as this will make them too heavy to stay on the tree.  I used the back of a teaspoon to smooth off the extra chocolate back into the bowl.  Whilst the chocolate is still melted, roll the cake pop around in the sprinkles and leave to dry on the baking tray lined with grease proof paper.  Repeat with the remaining cake pops.
  7. Leave to chill in the fridge until fully set. To use as baubles, use sellotape to attach one end of the ribbon to the cake stick where it meets the cake.  Wind the ribbon around the stick and sellotape firmly at the top.  Add a loop of ribbon and sellotape in place, then hang from the tree!


Christmas Cake Pop Bauble2

Cake pops can be kept in the fridge for up to a week – although they usually get eaten well before then!  Because of the butter content, it’s best not to hang these on the tree until you really want them on display.  Keep them in the fridge whenever you can.  And remember – don’t hang them too close to warm fairy lights or on low-hanging branches if you have pets!

These can be decorated in an unlimited number of ways – your imagination is your only limit!  You can buy great sprinkles and edible glitter very reasonably priced in most supermarkets now.  Good luck, and enjoy!

N.B: If pre-Christmas time is limited, you can of course use these any time of year on regular cake-pop sticks.  I’ve used mine as take-home table settings in the past. (No-one’s ever too old for a party-bag!) They’re great for freezing to use at a later date too.

Cake Pop Collection

A Hungry Englishwoman in New York

I was fortunate enough to visit NY a couple of weeks ago, just days before Hurricane Sandy hit.   Visiting family and friends, the five day stay was packed full of all my favourite NY places to eat.  Here are a few of them – try to get to some next time you visit!

After plane-food for lunch, it’s a much anticipated dinner at one of my favourites, Hill Country.  A fabulous Texan restaurant with live music and more meat than you could ever imagine.  Take your pick from the meat menu, pick out a couple of sides and you’re done.  Simple and tasty. You can find it at 30th West 26th St.

The morning of day two brings with it blueberry pancakes at Bubby’s.

Found in NY’s Tribeca district, this place is rammed every time we go but don’t fear, there’s nearly always a spare table and if not, the wait won’t be long and will definitely be worth it!  For brunch, Bubby’s offers a mouth-watering menu, and a word of advice, take a large appetite with you – the portions are hugely generous, and bearing in mind you won’t need to eat again until dinner, great value for money! Find them at 120 Hudson St.

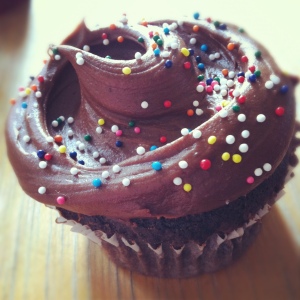
From Bubby’s you can walk north up Hudson St and you’ll eventually hit Bleecker St.  There are loads of great fashion boutiques along this part of Bleecker, including a couple of Ralph Lauren shops with truly fascinating window displays.  Should you be slightly peckish after your stroll, pop into Magnolia Bakery for a cupcake or two.  Whilst the SATC hype seems to have died down (I have been told of queues around the block) both the times I’ve been have been far more civilised, although it might be a bit of a squeeze once you’re in.  My favourite thing to do is to treat myself to a cupcake and enjoy it on a walk up on The Highline – a beautifully rejuvenated disused train track above the hustle and bustle of the city.

Another fabulous brunch!  If you’re looking for something more savoury than pancakes or waffles for brunch, the Pulled Pork Waffle at Sugar and Plumm is to die for, as is their entire menu!  Treat yourself to a cocktail too and you’ve got the perfect Saturday brunch.  They also have a great retail section where you can buy cookery books, gifts, chocolate etc, and take-home offerings of artisan chocolates, and delicious cakes, muffins and macaroons, all of which are made by Sugar Plumm skilled chefs.

A visit to New York is not complete without some shopping.  Head to Soho for an abundance of shops including my favourite, Madewell.  A bit like Topshop for grown-ups, Madewell offers everything from wallets to belts, from shoes to dresses and shoes.  Unfortunately they don’t yet deliver internationally from their online shop so make the most of the opportunity to stock up in store!

Retail therapy is thirty work however.   Luckily, just around the corner from Madewell is the most fantastic tea shop I’ve ever set eyes on.  Rows and rows of tins of loose leaf teas cover the walls of Harney & Sons.  Vibrant teapots and teacups and must-have accessories are beautifully displayed throughout the store.  And, almost hidden at the back, a lovely little tea bar,  Take a seat and your time perusing the choice of hundreds of teas.  My brother and I must have sent a good 20 minutes choosing our teas but it paid off.  The teas are all brewed to their own optimum brewing time and temperature.  Honey and milk are offered on the side but it seemed criminal to mar such a beautifully produced drink.  If you’re yearning for a good cuppa, you should definitely make a visit, but don’t expect to find any Tetley’s or PG Tips here!

My brother and I spoilt ourselves on the last day of my visit with breakfast at the Loeb Boathouse in Central Park.  It was a beautiful day with a  stunning blue sky and the leaves were just about to turn.  Work up an appetite with a walk through the park.  Alternatively you can hire a boat or a bike, depending how energetic you’re feeling!  While you won’t escape the crowds of the city at The Boathouse, (book ahead if you can!) you can almost forget where you are with the lakeside view and abundance of trees. The amazing views are matched by the quality of the food.  We both opted for the Eggs Benedict, which was more than enough pre-flight.  If you’re there for a more leisurely breakfast however, you can turn the meal into a three course affair.  Lucky you!

And so that brings to an end my brief tour of NY places to eat.  Have you got any others to recommend?

Lemon, Basil and Vanilla Loaf Cake

In the run up to Hugh Fearnley-Whittingstall’s new River Cottage series, 3 Good Things, this cake is based on my 3 Favourite Things.  Get the balance right and all three flavours will work in harmony to produce an unusual take on the traditional lemon drizzle cake.

Ingredients: 

225g unsalted butter – room temperature

225g caster sugar

4 medium eggs

Finely grated zest 2 lemons

225g self-raising flour

2 sprigs fresh basil leaves – finely chopped

1/2 vanilla pod

For the crunchy sugar top:

1 sprig fresh basil leaves – finely chopped

1/2 vanilla pod

Juice from 1 lemon

100g granulated sugar (I prefer to use this as it gives a crunchier topping but caster sugar will work if it’s all you have.)

Method:

1. Before starting the cake, first make the flavoured syrup that will be poured on it after baking.  Cut open the vanilla pod and scrape the seeds from the pod.  Combine the seeds with the lemon juice, sugar and chopped basil in a bowl and mix well.  You can also add the empty vanilla pod to infuse extra flavour or save it to make vanilla sugar, or to add to butternut squash soup.  Delicious!  Put the syrup aside to infuse.

2. In a pestle and mortar, or a food processor if you have one, mix the caster sugar with the lemon zest, chopped basil and the vanilla seeds from the other half of the pod.

3.  Cream the butter until softened.  Add the sugar mix and combine well until light and fluffy.

4.  Add the eggs one at a time and stir through with a spoonful of flour after each egg is added.

5.  Once all the eggs have been combined, add the rest of the flour and mix well.

6.  Pour into a greased and lined loaf tin and bake at 180°C for 45 minutes, or until a, inserted skewer comes out clean.

7.  Remove from the oven and place on a cooling rack (still in the tin).

8.  Use a skewer, cocktail stick or fine knife to pierce holes throughout the top of the cake.  This will encourage the syrup to run through the whole depth of the cake.

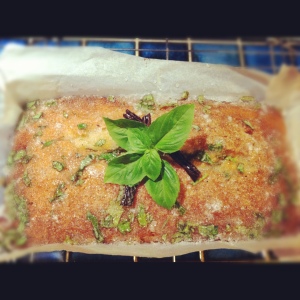
9.  Pour the pre-prepared syrup all over the cake and leave to soak through and cool.  You can use the remaining vanilla pod casing to decorate with a sprig of fresh basil.

10.  Serve with a lovely cup of tea – my favourite with this cake?…TeaPigs Earl Grey.


Lavender and Lemon Cakepops

From this…

Ingredients: (makes 20)

For the sponge:

200g self raising flour

1 tsp baking powder

1/4 tsp bicarbonate of soda

1/2 tsp salt

120g unsalted butter

200g caster sugar

Zest of 1 lemon

2 medium eggs

125ml full fat yoghurt

Sprig lavender buds

For the frosting:

120g unsalted butter (room temperature)

Zest of 1 lemon

200g icing sugar

1 tbsp milk

Sprig of lavender buds

To decorate:

20 x lollipop sticks

400g yellow candy melts

Vegetable oil

Handful of lavender buds

Method:

1. Preheat the oven to 180°C.  Lightly grease and flour a 20cm square cake tin.

2.  Remove the lavender buds from the stalk and add to the yoghurt to infuse.  Stir well.

3. Sift together the flour, baking powder, bicarbonate of soda and salt in a mixing bowl.

4.  In a different bowl, beat together the sugar and butter until light and fluffy.

5. Add the eggs, one at a time, stirring in a spoonful of the dry mixture with each egg. Add the remaining dry ingredients and lemon zest and mix well.

6.  Fold in the lavender yoghurt.

7.  Pour the sake mix into the tin and bake for 35 minutes or until a skewer comes out clean.

8.  Leave to cool for a few minutes, then turn out onto a cooling rack.

For the frosting:

1. Remove the buds from the lavender and add to the milk to infuse.

2. Cream the butter until soft and gradually add the icing sugar.  Mix until fluffy.

3.  Add the zest and finally the lavender milk and stir until well combined.

To construct the cake pops:

1. Once the cake is cooled, break up into a breadcrumb consistency.  Add the frosting a spoonful at a time and stir through.

2.  Once enough frosting has been added to make a doughy consistency, place in a refrigerator for an hour or until firm.

3.  Break up the mixture into 20 equal sized portions and roll into balls. Refrigerate again until firm.

4.  Melt the candy melts in the microwave according to the packet instructions, stirring frequently.

5.  Once fully melted, add a little vegetable oil and stir well to thin the candy to a pouring consistency.

6.  Insert one end of each lollipop stick into the candy and then insert into a cake pop.  The candy will act as a glue once dried. Repeat for the remaining cake pops.

7. Dip each cake pop fully into the candy and shake off any excess to leave an even coating over each pop.  Sprinkle with a few lavender buds and leave to cool.  I tend to stand mine up in egg cups but you can fashion cake pop holders out of a block of polystyrene or wood.

8. Share, eat, enjoy!

To this!…

Box Hill Bicycles – Gingerbread biscuits

These work best if you’ve got time to chill the dough in the fridge (preferably for a couple of hours or even overnight), but don’t worry, they still work if you’re short of time.  Depending on your size of cookie cutter, you can get up to around 24 biscuits out of these ingredients.  I managed to make 20 bike biscuits out of mine.  Don’t forget, even ground spices don’t last forever.  Most of us are guilty of letting spice jars sit in cupboards for months (if not years) but they won’t taste anywhere near as punchy, and I like punchy gingerbread!

Ingredients:

400g plain flour

3/4 tsp bicarbonate of soda

2 tsp ground ginger

2 tsp ground cinnamon

1/2 tsp ground allspice

Nutmeg (You can use 1 tsp ground nutmeg but I prefer to finely grate around a quarter of a nutmeg)

2 balls stem ginger (finely diced)

180g slightly salted butter

125g muscovado sugar

1 egg

125g black treacle

Method:

1. Cream together the butter and sugar until soft and fluffy.

2. Beat in the egg and treacle.

3. Measure the remaining ingredients into a large mixing bowl and mix well.

4. Slowly add the dry mix to the treacle mix and stir well.  (You’ll be thankful if you own a KitchenAid for this bit!)

5.  Continue to add the dry mix until everything has been combined and you have a smooth dough. (You may find this is either too dry or too wet.  If too dry you can add a little of the stem ginger syrup to ease the mix.  If too wet, add a little flour but not too much. The dough will stiffen once refridgerated.)

6.  Cover the dough with cling film and place in the fridge for as long as you can wait (or overnight).

7.  Preheat the oven to 170°C and line a large baking sheet with greaseproof paper.

8.  Lightly sprinkle your work surface  and rolling pin with a little flour.

9.  Split the dough into manageable sized pieces and roll out the first piece to a thickness of a pound coin.

10.  Use your cookie cutter to cut out the shapes and place onto the baking sheet.  Once full, place the cookies in the oven for 12 minutes. Remove from the oven.  Leave to cool on the sheet for a couple of minutes before transferring to a baking sheet.

11.  Repeat with the rest of the dough until you have worked your way through it.

12.  Decorate as desired!


Individual Upsidedown Cakes


Until last weekend, I hadn’t made an upside-down cake since a home-economics lesson many years ago.  Here’s my recipe for the individual versions of this classic cake, for which I’ve topped with both berries and pineapple.

Ingredients: (Makes 6)

9 x blueberries

9 x raspberries

9 x strawberries

Small punnet prepared pineapple

225g butter (room temperature)

225g caster sugar

4 medium eggs

225g self-raising flour

1/2 tsp baking powder

Method:

1.  Preheat the oven to 180°C.  Lightly grease a 6-hole muffin tray.  I prefer to use a silicon tray for these as its flexibility lends itself to the best results.  If using a silicon tray, place this on a baking sheet.  This will make it easier to carry between work surfaces and the oven arm will help prevent spillages.

2.  Before starting, I like to slightly caramelise the fruit.  To do this, place the berries in a pan with a splash of water and a sprinkling of caster sugar and heat until the fruit softens and the water starts to turn into a puree.  With the pineapple, I used a griddle pan and a handful of muscovado sugar to give the pineapple a sweet caramel coating.

3.  Divide the fruit between the muffin tins and push down to ensure it’s as compact as possible.

4.   Cream the butter and sugar until well combined.  Add the eggs one by one, together with a spoonful of flour with each egg to prevent curdling.  Once the eggs have been combined, add the remaining flour and baking powder and mix well.

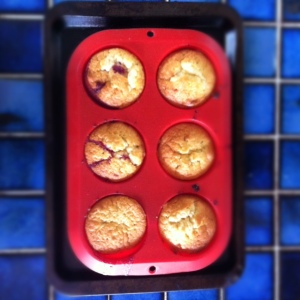
5.  Divide the cake mix between the 6 muffin tins.  Place the cakes in the oven and bake for 15 minutes or until golden and firm to the touch.  I like to use a metal skewer to ensure they are cooked through.

6.  Remove from the oven and leave to cool in the silicon tray.  Turn the silicon inside out to remove the cakes.  Store in an airtight container for up to 3 days if you can, otherwise enjoy straightaway with a splash of cream.  Yum!


Marbled Chocolate Brownies

Unfortunately these were eaten too quickly for me to get a decent photo!  But at the end of the day a brownie is a brownie – I’m sure you can use your imagination!

Ingredients:

175g plain chocolate

175g white chocolate

225g margarine (Stork works perfectly)

3 eggs

1 tsp vanilla essence

75g self-raising flour

100g white chocolate chips

100g plain chocolate chips

Method:

1.  Grease and baseline an 8″ square tin.  Preheat oven to 190°C.

2.  Divide the margarine in half between two microwavable bowls.  Break the chocolate into small pieces.  Add the white chocolate pieces to one bowl and the plain chocolate to the other bowl.  Melt both sets of chocolate and margarine in the microwave.  (Heat each bowl separately.)

3.  In another bowl, combine the eggs, sugar and vanilla essence.  Divide the sugar mix between the two bowls of chocolate and stir well.  Fold in half of the flour to each mixture and add the corresponding chocolate chips.

4.  Using a large spoon, ladle or by decanting into pouring jugs, decant the mixtures into the prepared tin. Try to keep the flavours as separate as possible.  (I like to use a ladle to pour in alternating spoonfuls of each flavour.)

5.  Once all of both mixes have been added to the tin, place in the oven for 40 minutes.  It may still seem squidgy to the touch but will continue to bake in the tin once it has been removed from the oven.

6. Leave to cool in the tin.  Once out-turned, use a pizza slicer or knife to cut into 16 portions.

7.  Enjoy warm with ice cream and a handful of strawberries!

Quick and Easy Mini Chocolate Easter Nest Cakes

These  cakes are the perfect size for little ones, and are still naughty enough for grown-ups and are small enough to not feel guilty about!  Kids will love helping create the tiny nests – probably a perfect job for little fingers.  They’ll be just as eager to lick the spoon too!

Ingredients: (Makes approx 24)

80g soft margarine

2 medium eggs

80g self-raising flour

30g cocoa powder

1 tsp baking powder

80g caster sugar

For the icing and nests:

Large handful shredded wheat bitesize cereal

100g dark chocolate

Cheat’s ingredient: 1 tub ready made chocolate frosting (I prefer Betty Crocker’s Chocolate Fudge Icing)

1 packet mini eggs

Method:

1. Preheat oven to 180°C.  Line a mini muffin tin with mini paper cases.

2. Measure the caster sugar and margarine into a bowl and combine.  Add the eggs one at a time and mix well.  Sift the flour, baking powder and cocoa into the bowl and stir until well combined.

3.  Spoon the cake mix into an piping bag and squeeze equal volumes into each mini case.  (You need them to be just under half full.)  If you don’t have piping bags, a couple of teaspoons will do the job – just be careful not to drip too much!

4.  Place into the oven for appox 12 mins or until risen and firm.  (A skewer should come out clean after being inserted into a cake.)

5.  Remove from the oven.  Leave to cool for a couple of minutes and place the cakes on a cooling rack.  If you still have cake mix left re-line the tin and bake a second batch.

6.  Once all cakes are cooled it’s time to make the nests.  Break up the chocolate and melt slowly either in the microwave or over a pan of hot water.  (If using a microwave be sure to stir at 30 second intervals to prevent burning.)  Break up the shredded wheat into fine twig-like pieces and combine with the melted chocolate.  Cover a plate with cling film and spoon small piles of the mix onto the plate.  Using the back of a teaspoon make a dent in each pile and push a mini egg into it.  Once finished, place the plate in the freezer for a couple of minutes to quickly set the nests.

7.  Using a blunt knife, ice each of the cakes with the frosting.  You can use hot water to clean the knife each time – the hot metal will also help create a smooth finish to the frosting.  (Be sure to supervise children around hot water.)

8.  Place one nest on each frosted cake and push down gently to hold it in place.  Place in the fridge to set.

(If you’re in even more of a hurry, skip the nest part and push mini eggs directly into the top of each frosted cake.)

9.  Share and enjoy!